This is the third part of a series of tutorials about terminal-friendly application. This one will focus on user inputs!
- Terminal application part. I: Styles & Colors
- Terminal application part. II: Moving & Editing
- Terminal application part. III: User Inputs
This tutorial will focus exclusively on the Terminal-kit lib for Node.js. Make sure to npm install terminal-kit before trying the given examples.
Keyboard inputs!
The .grabInput() method turns input grabbing on. When input grabbing is on, the terminal will switch to what is known as the raw mode.
From wikipedia:
Raw mode:
Raw mode is the other of the two character-at-a-time modes. The line discipline performs no line editing, and the control sequences for both line editing functions and the various special characters ("interrupt", "quit", and flow control) are treated as normal character input. Applications programs reading from the terminal receive characters immediately, and receive the entire character stream unaltered, just as it came from the terminal device itself.
The first thing you need to know: your program will not exit when you hit CTRL-C anymore. Instead, you will have to watch for CTRL-C and use process.exit() by yourself.
Turning input grabbing on make your terminal interface emit key events.
Here is a small example:
var term = require( 'terminal-kit' ).terminal ;

term.grabInput() ;

term.on( 'key' , function( name , matches , data ) {
    console.log( "'key' event:" , name ) ;

    // Detect CTRL-C and exit 'manually'
    if ( key === 'CTRL_C' ) { process.exit() ; }
} ) ;
The key event is emitted with three arguments:
- name
stringthe key name - matches
Arrayof matched key name - data
Objectcontains more informations, mostly useful for debugging purpose, where:- isCharacter
booleanis true if this is a regular character, i.e. not a control character - codepoint
number(optional) the utf-8 code point of the character, if relevant - code
numberorBuffer, for multibyte character it is the rawBufferinput, for single byte character it is anumberbetween 0 and 255
- isCharacter

Usually, if the name argument's length is 1, this is a regular character, if it is longer, it is a special key code, like CTRL_C, ENTER, DELETE, TAB, UP , HOME , F1, and so on... But be careful! A single asian character (Chinese, Japanese and Korean) always has a length of 2, so you should not rely on that and instead always data.isCharacter if you want to know if it is a true regular character or not.
The full list of special key's code can be found here
Note that there are few issues with the way keys produce inputs in a terminal application that you should be aware of.
That's not the lib that should be blamed for that, but the way terminals actually works. Have in mind that it's not a kind of keyboard driver that pass keys to our application, we are just reading from the Standard Input stream (STDIN). And that's your terminal that pushes bytes into that STDIN stream.
For that purpose, the matches argument contains all matched keys. This is because sometimes, the input stream produces code that matches many possibilities. E.g. ENTER, KP_ENTER and CTRL_M are all producing a 0x0d in STDIN. TAB and CTRL_I both produce 0x09, BACKSPACE usually produces a 0x08 like CTRL_H, ...
When multiple matches happens, Terminal-kit will pass as the name argument the most useful matches. By the way ENTER has a greater priority than CTRL_M, TAB has greater priority than CTRL_I and BACKSPACE greater priority than CTRL_H.
Actually, all Ctrl-letter combo key produce a control character, i.e. one of the 32 lower ASCII character. But most of those control characters are useless nowaday, so it is safe to use almost all Ctrl-letter except CTRL_M, CTRL_I and CTRL_H.
Finally, you should be aware that special keys produce input in STDIN that vary greatly from one terminal to another. E.g. there is rarely two terminals that produce the same escape sequence for all F1 to F12 keys. Terminal-kit try to abstract that away from you, but exotic terminals can still causes some detection troubles. That's because there isn't any standard for that.
Also, some terminals like Gnome-terminal will intercept function keys for their own stuffs, e.g. F1 will open the Gnome-terminal help window, F11 will go fullscreen, ALT_F4 will close the window, and your application will never get those intercepted keys. So, the best practice is to bind multiple keys for the same action in your application. If you are going to use function keys, try to bind a function key and it's shift or ctrl variant to the same action, e.g. F1, CTRL_F1 and SHIFT_F1: if the terminal intercepts F1, there are chances that SHIFT_F1 will work...
Even better, if it's relevant and you can afford it, allow your users to configure their own key binding.
When you are done with user input, you can turn input grabbing off with .grabInput( false ). The terminal will leave the raw mode and returns to the cooked mode.

A bit further: mouse handling!
Terminal-kit supports mouse handling. To turn mouse handling on, simply pass an object of options to .grabInput()!
Example:
var term = require( 'terminal-kit' ).terminal ;

term.grabInput( { mouse: 'button' } ) ;

term.on( 'mouse' , function( name , data ) {
    console.log( "'mouse' event:" , name , data ) ;
} ) ;
The mouse option can take three values:
- 'button': report only button-event
- 'drag': report button-event and report motion-event only when a button is pressed (i.e. a mouse drag)
- 'motion': report button-event and all motion-event, use it only when needed, many escape sequences are sent from the terminal (e.g. you may consider it for script running over SSH)
The key event is emitted with two arguments:
- name
stringthe name of the subtype of event - data
Objectprovide the mouse coordinates and keyboard modifiers status, where:
- x
numberthe row number where the mouse is - y
numberthe column number where the mouse is - ctrl
booleantrue if the CTRL key is down or not - alt
booleantrue if the ALT key is down or not - shift
booleantrue if the SHIFT key is down or not
- x
The argument 'name' can be:
MOUSE_LEFT_BUTTON_PRESSED: well... it is emited when the left mouse button is pressedMOUSE_LEFT_BUTTON_RELEASED: when this button is released.MOUSE_RIGHT_BUTTON_PRESSED,MOUSE_RIGHT_BUTTON_RELEASED,MOUSE_MIDDLE_BUTTON_PRESSED,MOUSE_MIDDEL_BUTTON_RELEASED: self explanatory.MOUSE_WHEEL_UP,MOUSE_WHEEL_DOWN: self explanatoryMOUSE_OTHER_BUTTON_PRESSED,MOUSE_OTHER_BUTTON_RELEASED: a fourth mouse button is sometime supported by terminals.MOUSE_BUTTON_RELEASED: a button were released, however the terminal does not tell us which one.MOUSE_MOTION: if the option{ mouse: 'motion' }is passed to grabInput(), every moves of the mouse will fire this event, if{ mouse: 'drag' }is given, it will be fired if the mouse move while a button is pressed.
Again, there are some issues to be aware of.
Firstly, do not expect all terminals to emit all *_RELEASED subtype. You should not rely on this, or you should at least have some fallbacks. E.g. Gnome-terminal emits MOUSE_LEFT_BUTTON_RELEASED and MOUSE_RIGHT_BUTTON_RELEASED, but does not emit MOUSE_MIDDEL_BUTTON_RELEASED... don't ask me why... -_-'
Secondly, do not expect all terminals to support the option { mouse: 'motion' }. E.g. the KDE Konsole will only report the MOUSE_MOTION event-subtype when a button is pressed, the same way it works with the { mouse: 'drag' } mode.
Thirdly, some terminals intercept right click to display a context menu. Gnome-terminal used to do that, but it seems that newer versions (at least on my Fedora at time of writing) don't do that anymore when the terminal has switched to raw mode, which was done with .grabInput().
By the way, the good old Xterm works perfectly fine! Outdated UI/UX, but extremely reliable when it comes to raw features support.
The Ultimate Geek Touch: Terminal-kit even supports the mouse in the Linux Console by talking directly with the GPM driver if it is installed on your box. Seriously, I'm quite proud of that, since I have almost done reverse engineering to provide that. Yay, there is no documentation for the GPM driver, so one have to: read the source code, watch inputs and outputs, guess how it works, repeat.
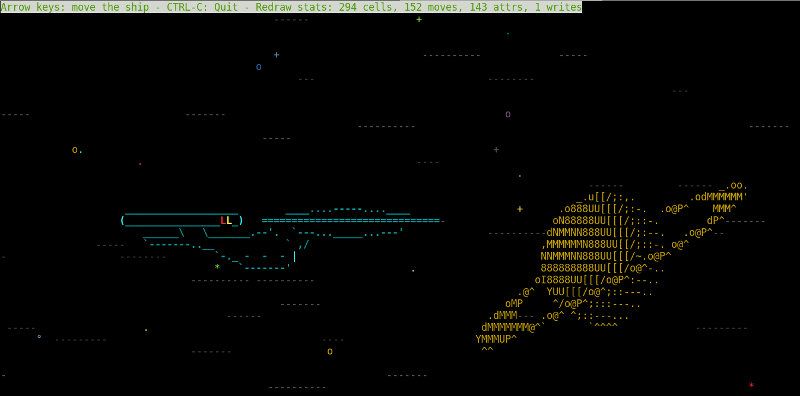
Putting it all together
Here a small sample code that allows one to write anywhere on the screen, using arrow keys to move while other keys are echoed:
var term = require( 'terminal-kit' ).terminal ;

term.grabInput( { mouse: 'button' } ) ;

term.on( 'key' , function( key , matches , data ) {

    switch ( key )
    {
        case 'UP' : term.up( 1 ) ; break ;
        case 'DOWN' : term.down( 1 ) ; break ;
        case 'LEFT' : term.left( 1 ) ; break ;
        case 'RIGHT' : term.right( 1 ) ; break ;
        case 'CTRL_C' : process.exit() ; break ;
        default:
            // Echo anything else
            term.noFormat(
                Buffer.isBuffer( data.code ) ?
                    data.code :
                    String.fromCharCode( data.code )
            ) ;
            break ;
    }
} ) ;

term.on( 'mouse' , function( name , data ) {
    term.moveTo( data.x , data.y ) ;
} ) ;

Misc inputs with the 'terminal' event
The terminal event is a general purpose event for all things coming from your terminal that are not key or mouse event.
The terminal event is emitted with two arguments:
- name
stringthe name of the subtype of event - data
Objectprovide some data depending on the event's subtype
The SCREEN_RESIZE subtype is emited when the terminal is resized by the user. The data argument will contain the width and height property: the new size of the screen expressed in characters.
Finally, if .grabInput() was called with the { focus: true } option, a terminal event will be emited with FOCUS_IN or FOCUS_OUT subtype when the terminal gains or loses focus. Not all terminal supports that.
Next time?
So, we have learn many interesting things, but we have not explored all features Terminal-kit has.
Next time we will learn how to use higher level user-inputs methods, like .inputField().
I hope you enjoyed this tutorial!