
Terminal-friendly application with Node.js - Part. I: Styles & Colors

- Terminal application part. I: Styles & Colors
- Terminal application part. II: Moving & Editing
- Terminal application part. III: User Inputs
Prologue
Have you ever wanted to make your CLI script shine? While cool scripts expose colors and styles, you are still stuck with black & white boring text? Hey! I've got something for you!
In this series of article, we will explore how to build a great terminal application: how to move the cursor, edit the screen, handle keyboard input, handle mouse input, and even more goodies!
But let's start with something simpler... Life is really bland without colors, doesn't it?... Let's add some spicy colors to our terminal application!
The hard way
You wonder how colors and styles are achieved? You guess that one have do deal with an obscur underlying driver? Actually, you're wrong: you can do that with a simple console.log().
So let's write a red "Hello world!":
console.log( '\x1b[31mHello world!' ) ;
Yes, you guessed it: \x1b[31m is an escape sequence that will be intercepted by your terminal and instructs it to switch to the red color. In fact, \x1b is the code for the non-printable control character escape... you know, that key on the top-left corner of your keyboard?
Eventually, if we want to produce a notice of this kind:
Warning: the error #105 just happened!
... you will have to code this:
console.log( '\x1b[31m\x1b[1mWarning:\x1b[22m \x1b[93mthe error \x1b[4m#105\x1b[24m just happened!\x1b[0m' ) ;
Just copy-paste it to the node's REPL console, to try it out!
Okey, now if you want the full list of what you can achieve with control sequences, have a look at the official xterm's control sequences guide.
Isn't that nice? We don't have to deal with an obscur underlying driver! We just have to deal with obscur escape sequences!
But that's not all: complex sequences are not compatible between all terminals.
Ok, ok... Let's hunt for a good lib then...

Popular libs
Since the goal of this part is just to put some colors and styles to our terminal application, there are two popular packages with a very high download count in the npm's registry: colors and chalk.
Escape sequences dealing only with colors & styles are known as ANSI escape code, they are standardized and therefore they work everywhere. That's the focus of those two packages.
The first package, colors, is probably the oldest package around dealing with colors and styles. At time of writing, it has no less than 3.5 millions of downloads for the last month.
Some example of the syntax, taken directly from the package's documentation:
var colors = require('colors');

console.log('hello'.green); // outputs green text
console.log('i like cake and pies'.underline.red) // outputs red underlined text
console.log('inverse the color'.inverse); // inverses the color
console.log('OMG Rainbows!'.rainbow); // rainbow
console.log('Run the trap'.trap); // Drops the bass
This is the old syntax. While it looks really easy to use, note that it extends the native String object, which is a very bad thing.
Due to popular pressure, some of them directly coming from the author of the chalk package itself, now colors can be required without extending native object... Of course, the syntax differs:
var colors = require('colors/safe');

console.log(colors.green('hello')); // outputs green text
console.log(colors.red.underline('i like cake and pies')) // outputs red underlined text
console.log(colors.inverse('inverse the color')); // inverses the color
console.log(colors.rainbow('OMG Rainbows!')); // rainbow
console.log(colors.trap('Run the trap')); // Drops the bass
The chalk package has recently surpassed colors, at time of writing its download count reached 5.7 millions.
Again, taken directly from the chalk's documentation:
var chalk = require('chalk');

// style a string
console.log( chalk.blue('Hello world!') );

// combine styled and normal strings
console.log( chalk.blue('Hello') + 'World' + chalk.red('!') );

// compose multiple styles using the chainable API
console.log( chalk.blue.bgRed.bold('Hello world!') );

// pass in multiple arguments
console.log( chalk.blue('Hello', 'World!', 'Foo', 'bar', 'biz', 'baz') );

// nest styles
console.log( chalk.red('Hello', chalk.underline.bgBlue('world') + '!') );

// nest styles of the same type even (color, underline, background)
console.log( chalk.green(
    'I am a green line ' +
    chalk.blue.underline.bold('with a blue substring') +
    ' that becomes green again!'
) );
The outsider: terminal-kit
It's time to introduce my little gem: terminal-kit.
The basic part of terminal-kit, the part dealing with styles and colors was inspired by chalk. It's easy, you can combine styles and colors, and furthermore, you don't have to use console.log() anymore. Why? Because terminal-kit IS a terminal lib, not just an ANSI's style helper.
Just compare the chalk's way:
console.log( chalk.blue.bold( 'Hello world!' ) ) ;
... and the terminal-kit's way:
term.blue.bold( 'Hello world!' ) ;
Less cumbersome, right?
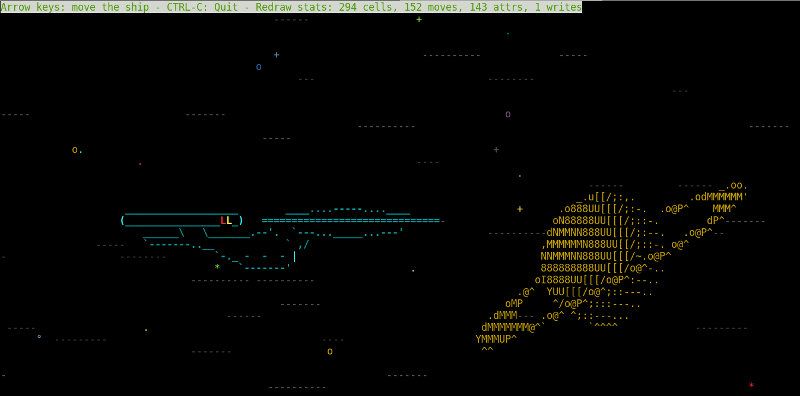 This is the spaceship demo! After doing an
 npm install terminal-kit, go to node_modules/terminal-kit/demo/ and run ./spaceship.js to see it alive!
Let's have a look to some of the terminal-kit's primer, from the documentation:
// Require the lib, get a working terminal
var term = require( 'terminal-kit' ).terminal ;

// The term() function simply output a string to stdout, using current style
// output "Hello world!" in default terminal's colors
term( 'Hello world!\n' ) ;

// This output 'red' in red
term.red( 'red' ) ;

// This output 'bold' in bold
term.bold( 'bold' ) ;

// output 'mixed' using bold, underlined & red, exposing the style-mixing syntax
term.bold.underline.red( 'mixed' ) ;

// printf() style formating everywhere: this will output 'My name is Jack, I'm 32.' in green
term.green( "My name is %s, I'm %d.\n" , 'Jack' , 32 ) ;

// Width and height of the terminal
term( 'The terminal size is %dx%d' , term.width , term.height ) ;

// Move the cursor at the upper-left corner
term.moveTo( 1 , 1 ) ;

// We can always pass additionnal arguments that will be displayed...
term.moveTo( 1 , 1 , 'Upper-left corner' ) ;

// ... and formated
term.moveTo( 1 , 1 , "My name is %s, I'm %d.\n" , 'Jack' , 32 ) ;

// ... or even combined with other styles
term.moveTo.cyan( 1 , 1 , "My name is %s, I'm %d.\n" , 'Jack' , 32  ) ;
Okey, what if you don't want to output a string directly on the terminal, but just put it into a variable like colors and chalk does? Easy: just add the str property into your chainable combo:
var myString = term.red.str( 'Hello world!\n' ) ;
It happens that at least 95% of time, we deal with color only when we are about to output something directly into the terminal, and don't care about storing a string containing obscur escape sequences into some variable... That's why the default behaviour of the lib is to print, not to return.
If you want to output to stderr instead, just add the error property into your chainable combo:
term.red.error( 'Some errors occurs...\n' ) ;
Here is the list of styles the lib support:
- styleReset: reset all styles and go back to default colors
- bold: bold text
- dim: faint color
- italic: italic
- underline: underline
- blink: blink text, not widely supported
- inverse: foreground and background color
- hidden: invisible, but can be copy/paste'd
- strike: strike through
Note that your terminal may not support all of those features.
And now, here is the list of supported colors: black, red, green, yellow (actually brown or orange, most of the time), blue, magenta, cyan, white, brightBlack (grey, it sounds dumb, but in fact it's the combo of black and bright escape code), brightRed, brightGreen, brightYellow (true yellow), brightBlue, brightMagenta, brightCyan and brightWhite.
If you want to change the background color of characters about to be written, just prefix the above colors with 'bg' (and don't forget the camelCase rule, e.g. cyan becomes bgCyan).

For example, if you want to output 'Hello world!', 'Hello' in bold red over cyan and 'world!' in italic green over magenta for maximum contrast and bleeding eyes, just do that:
term.red.bgCyan.bold( 'Hello ' ).green.bgMagenta.italic('world!\n') ;
Hello world!
Ok, ok... Let's stop making that kind of insane example now...
Finally, if we are not bothered by very old terminals, we can use all of the 256 colors. Most terminal support them.
- .color256(register): it chooses between one of the 256 colors directly
- .colorRgb(r,g,b): pick the closest match for an RGB value (from a 16 or 256 colors palette or even the exact color if the terminal support 24 bits colors), r,g,b are in the 0..255 range
- .colorGrayscale(l): pick the closest match for a grayscale value (from a 16 or 256 colors palette or even the exact color if the terminal support 24 bits colors), l is in the 0..255 range
Example:
term.colorRgb( 0x33 , 0xff , 0x88 , "This is teal!" )
They all have their bg* counter-part, e.g.:
term.bgColorRgb( 0x33 , 0xff , 0x88 , "The background color is teal!" )
It's worth noting that providing some text to a style method will apply the color *ONLY* for the given text, while calling a style method without text will turn the current style on, until another style contradict that.
E.g:
term.red( "Red!\n" ) ;
term( "This is white\n" ) ;

term.red()( "Red!\n" ) ;  // Note the parenthesis
term( "This is red\n" ) ;
In practice, it's always good to define some handy shortcuts. For example, one may want to define a standard way to output errors. Putting it all together:
var logError = require( 'terminal-kit' ).terminal.error.bold.red ;

// Later...

logError( 'Oh my! A bad thing happens!\n' ) ;
I hope you liked this little tutorial, next time we will learn how to move the cursor and edit the screen.
See ya! ;)
Javascript's syntactic sugar

Truthy and Falsy
First, we need to understand the truthy and falsy concept, because it will be widely used in the second part.
Truthy and falsy is a common concept among dynamic language featuring loose typing.
Any value, whatever the type, belong to the truthy or falsy group. When an operator need a boolean value, truthy will be true and falsy will be false.
Those values are falsy:
undefined
null
false
0
NaN
''
Those values are truthy:
true
1
123    // any numbers that are not 0 are truthy
'some random string'    // any non-empty string are truthy
[]    // any array are truthy, even empty arrays
{}    // any object are truthy, even empty objects, except null (yay, null is an object...)
An if statement will execute its block of code if the expression is truthy.
if ( expression )
{
    // if expression is truthy, the following lines are executed
    ...
}
else
{
    // if expression is falsy, the following lines are executed
    ...
}

Syntactic Sugar
Here an unordered list of shortcuts that eases life and helps maintaining a neat and elegant codebase.
!! expression: a very elegant way to cast a variable or an expression into a boolean, much more pleasant than the cumbersomeexpression ? true : false. It is also known as the double not. How it works?!returns the inverse boolean value of an expression. Apply it twice and you are back to the original logical value of the expression, casted as a boolean.+ stringExpression: it converts a string expression into a number, e.g.typeof + '42' === 'number'is true. It works if+is used as an unary operator, when there are no left member.+ new Date(): it converts the Date value into a number, same mechanics than the previous one.optionalArgument || defaultValue: it returns optionalArgument if it is truthy, else it returns defaultValue.||is sometime refered as the default operator. In Javascript, the||and&&operator are a bit like flow controle, they don't produce booleans, but instead they return the last evaluated operand. Still, the returned operand is considerated truthy or falsy according to the logical rules of AND and OR operators.Also, the first variable was named optionalArgument on purpose. Because it is an elegant way to define default parameter for functions when the type of the parameter is expected to be always truthy (object, array). Do not use when falsy values are expected.
function fn( optionalObject )
{
  optionalObject = optionalObject || {} ;
  ...
}
object && object.child && object.child.property: this is the guard operator, allowing us to safely access the property of nested objects. Without that, accessing directlyobject.child.propertywould raise an error ifobjectwas not an object, or ifobjecthas nochildproperty.!a !== !b: this is the easiest way to achieve a logical XOR (eXclusive OR) in Javascript. This expression is true ifais truthy orbis truthy, but not both of them. The not operator castaandbto boolean (while reversing their logical value), then if they are different, one and only one of them is true, therefore the whole expression is true.
Feel free to comment and share your own favorite syntactic sugar with us!
JavaScript's “NaN” demystified

Every JavaScript's bashers will troll you with this thing: the NaN === NaN statement is false.
At first glance, this looks like an awful misconception. It's very misleading, and it is always temptful to compare some variable with NaN. I used to think that it was a bad design choice that lead to this.
But I was wrong.
That's true, NaN is an unruly child. But the fact that “NaN is not NaN” is an absolute necessity.
I will try to explain you the reason.
But what is NaN?
NaN stands for “Not A Number”.
Still, typeof NaN is 'number'. More lulz for bashers... ;)
But again, there are some rationale behind that fact.
NaN is produced by some arithmetic operation, when the result is unknown and cannot be represented, even by Infinity.
Some examples of expression and their values:
1 / 0    // Infinity
-1 / 0    // -Infinity
0 / 0    // NaN
Infinity / Infinity // NaN
Infinity * 0    // NaN
Infinity - Infinity    // NaN
Math.sqrt( -1 )    // NaN
Math.log( -1 )    // NaN
NaN is used when the result is undefined (e.g. 0/0), or is not a real number (the square root of all negative numbers are imaginary numbers).
Therefore, NaN, as a language feature, IS programmatically a 'number'. That's why typeof NaN === 'number'. But as a mathematical entity, it IS NOT a number.
It MUST be of number type, so it can be autoboxed as an instance of Number, and thus have access to all methods of the Number's prototype. It is clear that any arithmetic operator or methods of the Math object should return a Number.
NaN is Not A Number from a mathematical point of view, not from a programming language point of view. Many programming language have a NaN concept, it is not a particularity or a fantasy of the JavaScript language. In fact, NaN is part of the floating-point spec, quoting Wikipedia:
Systematic use of NaNs was introduced by the IEEE 754 floating-point standard in 1985, along with the representation of other non-finite quantities like infinities.
Actually NaN exists in your bare-metal CPU's data representation, it is a special case of the float and of the double type. You have read it: it IS a special case of the float and the double type, that's why JavaScript tells you that typeof NaN === 'number'. Trust JavaScript, it is right!

Why NaN can't compare with itself?
Okey, again that's a question of point of view.
The main trouble comes from the fact that those operators == === != !== have two meanings. The first and immediate meaning is the mathematical equality. However, almost all programming language use the same operator to test equality or identity of any kind of non-numeric instance, e.g. string comparison, object identity, and so on.
NaN !== NaN is choking you, because you read it as an object's instance comparison. But NaN is of number type, so it is the mathematical version of those operators that kicks in there.
Ok, so you are now asking yourself why on earth NaN is different from NaN from a mathematical point of view?
That's pretty simple.
NaN is not a number, it represents something unknown.
Can you tell me how Infinity - Infinity and 0 / 0 compare? Is it really the same value to you? I hope your answer is NO or you need to study the math a bit more.
Moreover, compare Math.sqrt( -1 ) to Math.sqrt( -4 )... Both value are NaN because the square root of a negative number is an imaginary number. In the first case, the Complex Number value is i, in the second case it is 2i. Now I'm sure that you are glad that the JavaScript tells you that Math.sqrt( -1 ) !== Math.sqrt( -4 ) is true.
But then why Math.sqrt( -1 ) !== Math.sqrt( -1 )?
Again, that's logical. We all know how a programming language breaks down big expressions into smaller pieces.
First the left Math.sqrt( -1 ) is evalued and replaced by NaN, then the right Math.sqrt( -1 ) is evalued and replaced by NaN too. Finally the two NaN are compared with each other. At that point, JavaScript cannot tell if the first NaN represent i, 2i or whatever, since like most language, it doesn't have a native type for Imaginary Number. All it has is a comparison of two floating-point numbers, both saying that there are not floating-point numbers anymore.
If you are still confused, understand NaN as an Unknown Number.
NaN is not greater than anything, neither lesser than anything
We know for sure that NaN !== 0 is false.
However, NaN < 0 is false too, as well as NaN > 0.
You can try that for any numbers or Infinity (or even NaN itself), it will be false anyway!
How to deal with NaN
Short answer: use the global isNaN() function.
Better: if you don't have to deal with outdated browsers, use Number.isNaN(). It is more reliable. It is part of ECMAScript 6, a.k.a. Harmony.
You can learn the difference between those two on MDN.
Be aware: in many other programming language, things like a division by zero will throw an exception. JavaScript DO NOT throw any exception for that. The resulting value is simply NaN.
So you have to either check your input or your output, depending on what your code is doing.
You have to check with isNaN() everytime NaN could be expected, because:
NaN is viral!
Any computation with NaN produces NaN.
Let's look at that method, having in mind that this.a and value both equals zero:
MyClass.prototype.unsafe = function( value )
{
    this.b = this.a / value ;   // Now this.b is NaN
    this.c += this.b ;  // Now this.c is NaN
    this.d = 15 + this.c + this.e * this.g ;    // Now this.d is NaN
    ...
}
As you can see, your whole object will be filled with NaN in no time!
So be careful!

Finally: the good news!
Yes, I have a good news for you: NaN is a falsy value.
So a simple check with if ( myNumber ) { blah() ; } will avoid it, just like 0 null undefined false '' (...).
To be safe, just turn the previous code into that:
MyClass.prototype.safe = function( value )
{
    if ( ! value || typeof value !== 'number' )
    {
        // no division by zero or division by NaN anymore
        throw new Error( "Bad argument #0" ) ;
    }

    this.b = this.a / value ;
    this.c += this.b ;
    this.d = 15 + this.c + this.e * this.g ;
    ...
}
On the contrary, Infinity is a truthy value. Hopefully! ;)
First encounter with Atom-Shell (now known as Electron)

Update: Atom-shell is now knwon as Electron, and has a brand new website: electron.atom.io.
Atom-shell vs other node/chromium runtime technologies
Atom-shell is a framework based on node.js that include Chromium for rendering web page as well as for desktop integration. We can roughly state that it combines both the server-side and the client-side to build great multi-purpose desktop application.
From Atom-shell creators:
You could also see it as a minimal Chromium browser, controlled by JavaScript.
It is backed by Github, and looks promising. It all begins as a specific framework for the Atom IDE, but it has quickly proven that its goal was to provide a great framework for a large variety of desktop application.
It is one of the three frameworks doing that, namely nw.js, formerly known as node-webkit, and brackets-shell by Adobe.
I have discarded brackets-shell early in the process, because Adobe seems to develop it only for the brackets IDE purpose. There was no guarantee that it will be improved in the long run, neither that it will be developed as a multi-purpose framework in mind. Also in the past, I have been highly frustrated with the Adobe's way of documenting things... I remember Adobe AIR, and frankly: I don't want to experience such a pain again...
Also from their own overview:
Note: The brackets-shell is only maintained for use by the Brackets project. Although some people have definitely had success using it as an app shell for other projects, we don't provide any official support for that and we haven't done a ton of work to make the app shell easily reusable. Many people will likely find it easier to use a project like node-webkit, which is more generic by design.
This notice alone convinced me to stay away from that, forever.
But here is the serious challenger: node-webkit a.k.a. nw.js.
This framework already have a dozen of real life application, and there is even a game in the Steam store.
Node-webkit was built on top of node.js and webkit, hence the name. However it doesn't use any of them anymore: now it's based on io.js, the node.js' fork featuring Harmony (ECMA-Script 6), and Chromium. So they decided to rename it nw.js to avoid confusion.
The governance of nw.js looks more open than it used to be, which is a very good news. On the other hand Github is THE reference of open source collaboration: so we can expect a lot from the atom-shell's community in the future.
Technically, both projects are awesome.
It is not clear which one is better.
But I tend to prefer Atom-shell because its paradigm is more natural to me, particularly those points:
The entry point of the application is a Javascript file, not an HTML file: in my opinion this is cleaner
We can roughly state that it is the back-end that controle the entire application and I like that (I can be biased here, since I'm a back-end developer)
Consequently the back-end can create as many windows as it is needed... If I'm not wrong, nw.js has a main window that cannot be closed without closing the whole application, and new windows should be created by this main window. I found that a bit hacky...
The way node.js and Chromium are integrated together is easier and the KISS principle is something I care a lot in computer science... See the details of the integration here.
Multi-context, see the Atom-shell documentation:
If you are an experienced Node-Webkit user, you should be familiar with the concept of Node context and web context, these concepts were invented because of how the Node-Webkit was implemented.
By using the multi-context feature of Node, atom-shell doesn't introduce a new JavaScript context in web pages.
I found the API more cleaner and straightforward, typically the back-end side (named browser-side in the doc) controle a browser, can create windows, close them, define how they look, it can make it interact with the user's desktop... Everything look less hacky and natural. With nw.js it's like a webpage having eventually access to node.js' stuff, with Atom-shell we code like we will do in any other technologies (like for example the C++/GTK combo): it's more like coding a node.js application that can create windows with webpage. I prefer that coding paradigm, the other way is like looking upside-down.
For all those reasons, despite the popularity of nw.js, I decided to go with Atom-shell, after experimenting both of them few hours. There is no large application using Atom-shell at the moment, except Atom itself, but I bet on it...

Atom-shell: the browser-side and the renderer-side concept
The key to understand Atom-shell is the concept of browser-side (our good ol' back-end/server side) and renderer-side (also called web page, our good ol' front-end/client side).
The first deals with the system and controle the application globally, the second renders a web application in the window created by the first.
Both of them have access to node.js nonetheless, however it is possible to forbid that for a web page, for security reason, if our application is designed to browse some arbitrary website on the internet, rather than run local web content.
For browser to client interaction, we have to use either the IPC module (Inter-Process Communication) which is asynchronous, or the remote module for synchronous RPC (Remote Procedure Call).
The IPC module is familiar to any web developer: it's more or less the same paradigm as the client/server one. Asynchronous content is sent back and forth.
The remote module is easier, we can typically call any method of the browser-side from the renderer-side, just like if both side was the same entity... but be careful: there are some drawbacks!
Let's get our hands dirty!!!
After a week with Atom-shell, playing and coding seriously, there are few things worth mentioning here.
The remote module is really handy, however the only way to gain access to an object of the browser-side is to use remote.getGlobal(name) which bind a global browser-side variable to its renderer-side counterpart. I don't like to pollute the global scope just to provide some objects to the renderer's remote module...
I would prefer passing those objects at the BrowserWindow's instanciation, or as an extra parameter of .loadUrl().
I have created an issue for that, if you like the idea, please contribute to the discussion.
Also there is the problem of callbacks passed to the browser, see here for details.
While I understand what happen and how to avoid it, this forbid the usage of my lovely node.js' EventEmitter. I came up with this kind of design, before reading why it should be avoided:
// Renderer-side code:
var bridge = remote.getGlobal( 'bridge' ) ;
bridge.on( 'update' , function() {
    // do something
} ) ;
That kind of design is really neat, but forbidden... I wonder if it's worth trying to fix the potential exceptions issues with some boilerplated try-catch block, or if it's a definitive no-go...
Trouble with jQuery and workaround
In Atom-shell, we cannot include jQuery like we do usually, i.e. putting <script src="../js/jquery.js"></script> into the main .html file of the renderer-side.
At first glance, it was a bit frustrating, since the renderer/web page side claims to behave like any normal browser. However, it is not an Atom-shell issue. Actually jQuery detect a module and a module.exports global, and therefore expect a CommonJS context, thus decide to not install itself into window.$ as usual.
After a bit of googling, the workaround is easy, we have to require jQuery in the main .js file of the web page, this way:
window.$ = require( '../js/jquery.js' ) ;
For the record, here is the related issue on Github, giving all the details.
Conclusions?
I cannot say I'm an experienced Atom-shell developer at the moment. There are many things to explore, and a great app to build.
But I can say I enjoy it: it just does the job, and that's what we like. There is no fuss, I didn't find anything opinionated, or anything.
Just node.js and Chromium, together.
... to be continued...
Do not miss the other post on Atom-Shell / Electron: